Noises in the Reformer: How to Diagnose and Fix Them

Noises in your reformer: how to diagnose and fix them
If your reformer is making noise, the first step is to level it and check the screws: most reformer noises are fixed with basic adjustments, rail cleaning, and targeted lubrication. Only when the sound is metallic, dry, or accompanied by abnormal carriage movements should you remove the equipment from use and call technical support before continuing to teach classes.
In summary:
- Most reformer noises are fixed with basic adjustments, regular cleaning, and lubrication, avoiding unnecessary disassemblies.
- Squeaking indicates dry friction in wheels or bearings without lubrication, while humming usually results from structural vibrations.
- It is essential to level the reformer, check screws and wheels, and adjust tension to prevent noises and premature breakdowns.
- Monthly and annual preventive maintenance, which includes cleaning, lubrication, and hardware inspection, significantly reduces the occurrence of noises.
- Installing the reformer on cushioned floors and away from walls or corners helps minimize transmitted vibrations and background noise.
Table of contents
- Quick diagnosis guide: what type of noise is your reformer making?
- How to fix annoying reformer noises step by step
- Preventive maintenance schedule to avoid annoying reformer noises
- Which parts fail first and how much do they cost to repair?
- When to stop using the reformer for safety
- Installation and studio acoustics: what reduces background noise
- Specific care depending on the reformer model or brand
- Useful tools for detecting and repairing reformer noises
- Does the type of floor influence reformer noises?
- Reflection: operational priorities for studio owners and technicians
- How PilatesdeMexico helps solve and prevent noises in your studio
- Sources
- Frequently asked questions
Quick diagnosis guide: what type of noise is your reformer making?
Each sound points to a different cause, and confusing them wastes time on repairs that don't solve anything. A constant hum usually comes from structural vibration, often due to a support surface that amplifies the sound, similar to what happens with magnetostriction in electromechanical equipment, where small vibrations turn into an audible and annoying noise.
A squeak, on the other hand, is almost always dry friction: wheels or bearings without adequate lubrication, or a carriage rubbing against the rail due to a minimal misalignment. Metallic scraping indicates direct contact between parts that shouldn't touch, typically the carriage against the side structure. A dry, repetitive clunk, synchronized with the carriage's movement, almost always points to loose screws or a nut that has lost its original torque.
Before touching a single part, dedicate five minutes to this review:
- Check the reformer's level with a bubble level on both axes: a higher leg generates constant vibration.
- Run your hand along the entire rail, looking for dirt, lint, or accumulated debris.
- Visually inspect each exposed screw: those that turn with your finger without resistance are suspicious.
- Observe the condition of the wheels: if they have flat spots, cracks, or lateral play, they are worn.
- Push the carriage slowly from end to end and feel if there are points where it snags or vibrates differently.
Incorrect placement of the tension bar or the stopper also generates noises that seem mechanical but are adjustment-related. When the stopper does not properly secure the initial spring tension, the carriage can rub or vibrate erratically, which the stopper and tension bar placement guides explain in detail.
How to Solve Annoying Reformer Noises Step by Step
Resolving the most common noises does not require specialized tools or advanced technical knowledge, but it does require order. Follow this sequence before replacing any component.
- Level the reformer. Place a bubble level on the rail and adjust the adjustable legs until it is perfectly horizontal on both axes. Push the carriage from one end to the other: it should move without accelerating or braking solely by gravity.
- Clean the rails thoroughly. Use a dry cloth or one slightly dampened with water; never use abrasive products or solvents that could degrade the finish. Remove dust, lint, and accumulated sweat residue from the corners of the rail, where deposits that cause friction often hide.
- Lubricate sparingly. Apply a minimal amount of dry lubricant or silicone spray to the wheels and the carriage axle. Avoid conventional liquid oils: they attract dust and lint, and in a few weeks, the problem returns worse than before. Repeat this task once a month in studios with intense daily use.
- Tighten screws without forcing. Go over each structural screw with the appropriate wrench and tighten until you feel firm resistance, without overdoing it. An overtightened screw can crack the wood or deform the hardware; a loose one continues to generate knocking.
- Check the condition of nuts and bolts. If a nut spins without securing when tightened, or the bolt shows signs of wear on the thread, that component is fatigued and must be replaced, not just adjusted.
- Replace damaged wheels or bearings. Remove the affected wheel following the manufacturer's instructions, generally by releasing an axle or retaining clip. Install the new part of the same diameter and hardness, ensure the carriage slides without lateral play, and perform a full range of motion test before returning the equipment to service.
Pro Tip: Keep a small log with the date of each adjustment and which part you touched. When a noise reappears after a few days, that history immediately tells you if the problem is the part or the installation.
Avoid using thick grease or household motor oils: they are the number one cause of a "solved" noise returning in less than a month, because they form a sticky film that traps dirt instead of repelling it.
Preventive Maintenance Schedule to Avoid Annoying Reformer Noises
A noisy reformer maintenance problem rarely appears suddenly. It accumulates over weeks of skipped inspections. A simple schedule, delegable to any studio staff member, prevents most cases.
Daily:
- Quick visual inspection before the first class: does the carriage move without strange sounds?
- Visual level check, especially if the equipment has been moved.
- Superficial cleaning of the rail with a dry cloth after the last use of the day.
Weekly:
- Deep cleaning of rails, removing accumulated debris in the corners and under the carriage.
- Tactile inspection of wheels: check for lateral play or flat spots.
- Check the condition of straps and loops, looking for fraying or loose stitching.
Monthly:
- Selective lubrication of wheels and axles with a dry product, never liquid oil.
- Review of spring tension and tensioner function.
- Tighten visible screws with a wrench, without forcing.
Annually:
- Complete inspection of stainless steel hardware, looking for corrosion or fatigue.
- Check for structural play in the base and sides.
- Plan for spare parts based on wear observed during the year.
This scheme turns noisy reformer maintenance into a routine problem, not an emergency. Studios that assign these tasks to a dedicated person, instead of leaving them to the goodwill of each instructor, report fewer unexpected equipment downtimes.
Which Parts Fail First and How Much Do They Cost to Repair?
Not all reformer components wear out at the same rate. Knowing which ones to prioritize saves time and money.
- Carriage wheels and bearings: These are the most frequently failing parts due to constant friction against the rail; relatively low cost and short replacement time, usually less than an hour.
- Resistance springs: They lose tension with prolonged use and generate metallic noise when stretched; medium relative cost, usually available as original spare parts.
- Straps and loops: They fray or lose elasticity; low cost but frequent replacement in high-traffic studios.
- Screws and fastening hardware: Very low cost per unit, but it's advisable to check them as a set rather than piece by piece.
- Tension bar and braking system: When these fail, they directly affect carriage control; medium to high relative cost, and their adjustment often requires specialized technical support.
Buying genuine spare parts versus generic compatible alternatives makes a real difference in the lifespan of bearings and wheels: a poorly calibrated part can generate the same noise you were trying to eliminate, only sooner. Reformer spare parts with compatible specifications deserve review before buying based solely on price.
When to Stop Using the Reformer for Safety
Not all noises are cosmetic. Some are the last warning before structural failure.
- Stop use immediately if you hear a dry creak in the structure, a sudden metallic clunk that wasn't there before, or notice loose parts to the touch during carriage movement.
- Tag the equipment as out of service visibly so no instructor uses it by mistake while it's being checked.
- Document in writing when the noise started, in which exercises it manifests, and if it was progressive or sudden: this information speeds up technical diagnosis.
- Contact specialized technical support before attempting an improvised repair. Disassembling tension or structural components without experience can void the warranty and, more importantly, put the next user at risk.
The priority is always a complete structural inspection, not a quick patch. A noise that disappears after tightening a screw but whose real origin was a crack in the wood only buys time before a major failure.
Installation and Room Acoustics: What Reduces Background Noise
How a reformer is installed influences noise as much as subsequent maintenance. Correct anchoring and precise leveling from day one prevent resonance vibration that is later confused with part wear. Reformers built with certified Lyptus® FAS wood offer greater dimensional stability against humidity changes, reducing the risk of the structure itself becoming a sound box.
Environmental treatment also matters. Reflective surfaces near the equipment amplify any mechanical sound, while anti-vibration bases and adequate wall separation cut down on vibration transmission without needing to open the equipment. Some useful practices:
- Placing the reformer on a dampening base instead of directly on a hard floor.
- Leaving space between the equipment and walls or columns that can reflect sound.
- Checking anchor fasteners after every room relocation, not just during initial installation.
Pilates de México documents these practices in detail in its guide on how to reduce reformer studio reverberation time without closing classes, a useful resource when the noise isn't coming from the equipment, but from how the room reflects it.
Specific Care According to Reformer Model or Brand
Premium reformers, such as those from the MetaLife line, typically use stainless steel hardware and tighter tolerances between the carriage and rail. This reduces the play that causes noise but also demands more precise lubrication: excessive product in these narrow tolerances generates friction instead of reducing it.

Entry-level equipment, often manufactured with simpler materials and assemblies, tends to show noise earlier in its lifespan because the tolerances between parts are wider from the factory. This does not make them worse for starting a studio, but it does require more frequent screw inspections during the first few months, while the parts are still settling into their fit.
Models with an exposed spring system require regular visual inspection of hooks and anchors, while those that integrate the resistance system within the structure better protect these parts from dust but make quick visual diagnosis difficult: in these cases, sound is often the only available clue until the panel is opened.
Knowing which line you have installed and keeping the manufacturer's manual or technical sheet saves time when it's time to order an exact replacement instead of a "similar" one.
Useful tools for detecting and repairing reformer noises
You don't need a full workshop, but some basic tools make a difference between an accurate diagnosis and a blind one.
- Bubble level or digital level: essential to confirm the reformer is perfectly horizontal before blaming any part.
- Set of Allen wrenches and open-end wrenches of the exact size for the model's screws, to avoid damaging screw heads with incorrect tools.
- Dry lubricant or silicone spray, never conventional liquid oil.
- Microfiber cloth and soft-bristled brush to clean rails without scratching the finish.
- Voice recorder or cell phone, to capture the exact sound at different points of the carriage's travel and later compare it with known causes.
A simple but effective trick: recording the noise while someone else slowly pushes the carriage allows you to hear at what exact point in the travel the sound appears, something almost impossible to notice when you are moving the equipment yourself and paying attention to the physical effort at the same time.
Does the type of flooring affect reformer noises?
Yes, and more directly than it seems. A hard concrete floor without any cushioning transmits and amplifies any mechanical vibration from the reformer, turning a faint hum into an audible problem from the hallway. Wooden floors on an elevated structure, on the other hand, can generate their own resonance that adds to the equipment's noise, an effect also observed in gyms where invisible flooring factors generate noise complaints without the equipment having any real fault.
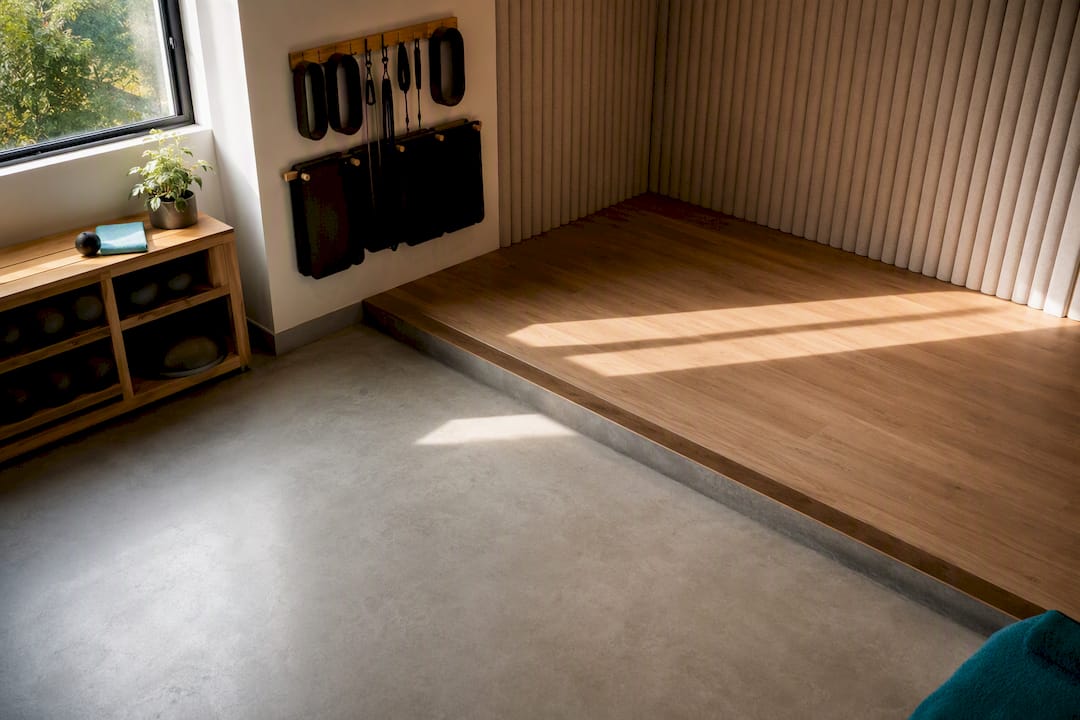
The location within the room also matters. A reformer placed against a wall without separation, or near a corner where sound bounces between two hard surfaces, will sound worse than the same equipment in the center of a room with basic acoustic treatment. This explains why two identical reformers, in two different rooms, can be perceived with completely different noise levels without either having a damaged part.
Reflection: operational priorities for studio owners and technicians
The temptation is always to fix the noise that bothers you today and forget the rest. It's an expensive mistake. Preventive maintenance costs a fraction of what a reactive emergency repair costs, especially when that emergency forces class cancellations. When safety or operational continuity are at stake, original spare parts are worth the price difference compared to generic alternatives with uncertain tolerances. And a simple maintenance log, however basic, is the most underestimated decision-making tool in any studio: it tells you if you're adjusting the same part every month or if it's time to replace it.
How PilatesdeMexico helps solve and prevent noises in your studio
Buying equipment without local technical support or available spare parts can lead to problems when the first noise appears. There are lines like MetaLife, built with certified Lyptus® FAS wood and stainless steel hardware designed to withstand years of daily classes without part tolerance becoming a premature noise problem.

We also offer more accessible professional options, such as the Infinity line and the Advanced line, for studios that are starting out and don't need to begin with the most expensive equipment in the catalog. If your current equipment is already making noise due to wear, our catalog of accessories and spare parts includes maintenance components, and we offer financing options when it makes sense to renew instead of continuing to repair piece by piece. Professional installation, consulting, and after-sales support can accompany the purchase, from initial anchoring to replacing a wheel years later.
Sources
To delve deeper into studio acoustics, check out PilatesdeMexico's guide on reverberation in reformer studios and the section on operational safety in the studio. For spare parts, consult the guide on after-sales support for reformers.
- Technical explanation on transformer noise and magnetostriction
- How to properly use the brake and tension bar of the Reformer | Pilates10Academy
- Guide to reducing noise in appliances without opening them
Frequently Asked Questions
What are the most common types of noise in a reformer?
The four main types are humming, squeaking, scraping, and knocking. Humming usually comes from structural vibration, squeaking from dry friction in wheels, scraping from direct metal-on-metal contact, and knocking from loose hardware.
How often should I maintain my reformer to prevent noise?
Ideally, a daily visual inspection, weekly deep cleaning of rails, and monthly selective lubrication. A comprehensive annual review of hardware and structural clearances completes the cycle and detects wear before it becomes audible noise.
When should I stop using the reformer and call technical service?
Stop use immediately if you hear dry creaks, new metallic knocks, or feel loose parts during carriage movement. Tag the equipment, record when the problem started, and contact technical support before attempting an improvised repair.
Can the type of flooring cause noise even if the reformer is in good condition?
Yes. A hard concrete floor without damping amplifies normal equipment vibrations, and a location next to a wall or corner creates additional sound reflections. A healthy reformer can sound bad simply because of the surface and its installed location.
Does PilatesdeMexico offer spare parts and support for noisy reformers?
Yes, PilatesdeMexico carries spare parts and maintenance accessories, as well as professional installation and financing for studios that need to renew equipment. Specific prices and availability are in the accessories catalog on the website.