Lower RT60 to 0.4–0.6 s: Reformer Studio Acoustics Without Class Interruptions
Lower RT60 to 0.4–0.6 s: Acoustics in a Reformer Studio Without Closing Classes
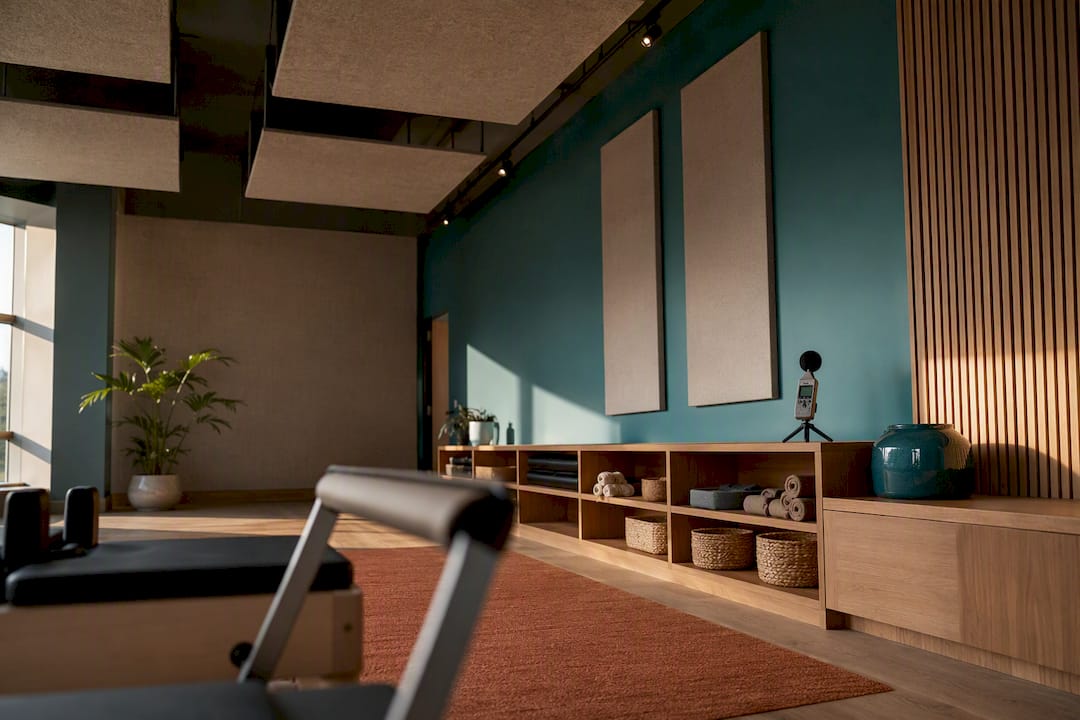
To improve the acoustics of a reformer studio, prioritize three areas: treating first reflection points, installing bass traps in corners, and sealing doors and windows. The goal is to lower the reverberation time (RT60) to a low enough level for spoken instruction to be understood without shouting. The process is simple: measure, apply quick fixes, and then measure again to confirm the improvement.
In summary:
- Acoustic improvement in a reformer studio requires treating first reflection points, installing bass traps, and sealing doors and windows, aiming for an RT60 below 0.6 seconds.
- Before investing in panels, it's recommended to perform basic tests like clapping, voice recordings, and app measurements to accurately assess reverberation and avoid over-treatment.
- Placing absorption panels at key points, diffusion on back walls, and bass traps in corners optimizes treatment without overcrowding the room.
- It is crucial to maintain symmetry and avoid opposing mirrors, as well as leaving enough space between reformers and walls to reduce short reflections and flutter echo.
- Improving acoustics also requires addressing mechanical noise at its source, such as reformers with quiet bearings and anti-vibration bases, before adding panels.
Table of Contents
- Quick Improvement Checklist for Your Reformer Studio Acoustics (1 to 7-day actions)
- How to Diagnose Your Reformer Studio Acoustics Before Investing
- Solutions by Category: Absorption, Diffusion, and Bass Control
- How to Distribute Treatment in a Reformer Studio with Mirrors and Fixed Equipment
- Materials, NRC and STC Metrics, and Estimated Budget
- Phased Implementation Plan to Avoid Interrupting Classes
- How to Verify That Acoustics Have Truly Improved
- Practical Lessons and Common Mistakes When Outfitting a Reformer Studio
- How Proper Equipment Reduces Noise Before Treating the Room
- Sources
Quick Improvement Checklist for Your Reformer Studio Acoustics (1 to 7-day actions)
Before considering technical panels, there are low-cost interventions that significantly reduce echo. They combine sealing air leaks, adding mass to hard surfaces, and damping under equipment, which are the same categories recommended by the gym acoustic treatment industry for quick noise reduction without major construction.
- Install weatherstripping and door sweeps under doors to seal sound leaks to hallways or adjacent rooms.
- Hang heavy curtains on windows and large glass surfaces.
- Add a rug with a non-slip backing in at least one section of the floor free from reformers.
- Temporarily place mobile panels or technical blankets at first reflection points, before permanently fixing anything to the wall.
- Install anti-vibration bases under each reformer and check spring and bearing adjustments to cut down mechanical noise at its source.
- Record your voice reading a paragraph from the center of the room, before and after each change.
- Repeat the clap test at the same point to audibly compare the echo decay.
This combination of sealing and damping often provides the biggest jump in clarity per invested dollar, as confirmed by industry experience in active sports spaces.
How to Diagnose Your Reformer Studio Acoustics Before Investing
Proper diagnosis prevents buying too many panels or placing them in the wrong spot.
- Clap test: Clap once sharply in the center of the room. If you hear a metallic tail or a prolonged "hum," the reverberation is high.
- Voice test: Speak in a normal tone from where the instructor usually stands. If you have to raise your voice to be understood at the back, there's an intelligibility problem, not just a volume issue.
- Mirror method: Ask someone to move a small mirror along the walls while you sit in each typical practice position. Every point where you see the reflection of the speakers or your own mouth is a first reflection point that needs treatment.
- App measurement: RT60 measurement tools on your phone provide a reasonable estimate for prioritizing; if the result exceeds 1 second in a practice room, it's advisable to schedule a professional measurement with a calibrated sound level meter.
- Data logging: Record the date, estimated RT60, temperature, and room capacity for each test, to allow for objective before-and-after comparisons.
Solutions by Category: Absorption, Diffusion, and Bass Control
Effective acoustic treatment combines three simultaneous actions: absorbing mid and high reflections, diffusing them when the room becomes too "dead," and controlling low frequencies that accumulate in corners, as SoundScapeHQ summarizes when describing the three pillars of treatment.
- Absorption: Mineral wool or fiberglass panels with an NRC of 0.80 or higher, placed precisely over the first reflection points detected with the mirror method. Ceiling "clouds" serve the same function when walls are already covered by mirrors.
- Diffusion: Recommended for small rooms that, after too much absorption, sound dull and make it difficult for the instructor to perceive the rhythm of their own voice. They are typically placed on the back wall or in areas not used for direct practice.
- Bass Control: Bass traps go in vertical corners, with at least 15 to 20 centimeters (6 to 8 inches) of depth. Shallow solutions do not resolve the energy accumulation around 50 Hz that often causes booming in rectangular rooms.
- Materials: Medium-density mineral wool usually outperforms generic acoustic foam in low and mid bands; cheap foam only helps with surface echo and is visually deceptive because it "looks like" professional treatment without being so.
Pro tip: Don't cover an entire wall just because "it looks good." Real improvement comes from hitting the exact location at the first reflection points, not from the amount of square footage covered.
How to Distribute Treatment in a Reformer Room with Mirrors and Fixed Equipment
The acoustic design of a reformer studio has a restriction not present in an office or recording studio: the front walls are usually covered with mirrors, and these mirrors cannot be replaced. The solution involves working symmetrically with respect to the instructor's axis and utilizing the ceiling when the walls no longer have free space.
- Keep the treatment symmetrical on both sides of where the instructor stands to prevent the room from "pulling" the sound to one side.
- Avoid facing mirrors without any absorbent element in between: they generate flutter echo, that metallic, repetitive echo so characteristic of rooms with mirror-to-mirror setups.
- Leave at least 40 to 50 centimeters (16 to 20 inches) between the reformer headrest and the back wall to reduce short reflections and facilitate passage.
- If the walls are occupied by mirrors, install acoustic clouds on the ceiling above the instructor's work area, which is the most effective surface when no wall space is available.
- Verify that no panel or bass trap obstructs emergency exits, ventilation grilles, or cable runs from the raised floor.
Materials, NRC and STC Metrics, and Estimated Budget
Always ask any panel supplier for two data points: the NRC (Noise Reduction Coefficient, which measures how much sound a material absorbs) and the STC (Sound Transmission Class, which measures how much it insulates between two spaces). A high NRC means the panel absorbs most of the sound that reaches it; a high STC indicates a good level of insulation between the reformer room and the adjacent space.
- Quick solutions (curtains, carpets, door seals): low budget, immediate results through surface damping without construction.
- Modular solutions (panels and bass traps): medium budget, installation in hours without affecting the premises' structure.
- Structural solutions (decoupling, double walls, soundproof doors): high budget, require construction, and are usually justified only when the problem is insulation from neighbors, not internal reverberation.
When comparing materials, also demand core density, manufacturer's warranty, and impact resistance, because a reformer room experiences daily traffic of wheeled equipment and frequent contact of hands and feet against lower panels.
Phased Implementation Plan to Avoid Class Interruption
A staggered approach minimizes studio downtime and orders the investment from lowest to highest cost, following the same phased logic applied by specialists in sports facility conditioning.
- Immediate Phase (Week 1): Door sealing, curtains, carpet, anti-vibration mats under reformers. This is executed outside of class hours, without needing to close the studio.
- Intermediate Phase (Weeks 2 to 4): Installation of acoustic panels and modular bass traps at the already diagnosed points. Coordinate installation with low-occupancy hours to avoid interrupting sessions.
- Structural Phase (when diagnosis requires it): Wall decoupling, double layer of drywall with viscoelastic compound like Green Glue, or replacement of doors with soundproof models. This is reserved for when the actual problem is transmission to neighboring premises, not internal reverberation.
Pro Tip: Hire contractors who offer an adjustment revisit after installation. The final placement of a panel is almost never perfect the first time, and a second calibration visit often makes the difference between a "good" room and a truly optimal room.
How to Verify that the Acoustics Truly Improved
The only reliable way to know if the treatment worked is to repeat the RT60 measurement under the same conditions as the initial test. For a medium-sized classroom, a reasonable target is between 0.4 and 0.6 seconds, a range in which the voice is clearly understood without sounding artificial.
- Repeat the voice recording from the exact same point as the previous measurement.
- Compare the sound of a clap: the tail should noticeably cut off much faster.
- Document the final position of each panel and bass trap with photos, useful as a reference if something is later disassembled.
- If the RT60 is still above target, re-locate panels to untreated reflection areas before adding more material.
A documented case in a gym showed an RT60 drop from 1.4 seconds to 0.48 seconds after installing panels and treating the ceiling, a reduction that in practice translates from having to repeat instructions to them being understood the first time.
Practical Lessons and Common Mistakes When Conditioning a Reformer Room
The most common mistake is not doing too little treatment, but over-absorbing. A room that is too "dry" mutes the instructor's voice and forces them to strain their voice throughout the class, which is the opposite of what is intended when caring for their vocal health. The second common pitfall is treating only the walls and ignoring mechanical noise: without anti-vibration mats or bearing inspection, no absorbent panel eliminates the structural rattling of a poorly adjusted reformer. As a practical rule, reserve professional measurement with a calibrated sound level meter for when the home diagnosis indicates an RT60 above 1 second or when there are complaints from neighbors about structural transmission.
How the Right Equipment Reduces Noise Before Treating the Room
No amount of panels can compensate for a reformer that rattles with every repetition. Pilatesdemexico tackles the problem at its source: reformers with silent bearings and stable structures that, combined with anti-vibration mats, reduce much of the mechanical noise before touching a single wall.
As an equipment partner behind reformer studios nationwide, Pilatesdemexico offers the Zürich Labs line and the premium Metalife line, built with certified Lyptus® FAS wood and stainless steel hardware designed for years of daily classes without generating annoying vibrations. There are also more accessible options manufactured in China for those opening their first studio without starting at the highest price point. Every purchase includes opening consultancy, packages for multiple pieces of equipment, and direct financing tailored to what it truly costs to fill a studio. If you are equipping or expanding your studio, review the full catalog of equipment lines and request a quote before defining your acoustic treatment plan.
Sources
Technical guides on noise control in gyms and the case study with measured RT60 reduction expand on the diagnosis and solutions described in this guide.
- Noise control in fitness establishments - European Acústica
- Gym. Acoustic treatment. Acoustic Panel - Serinac Insonorizaciones
- How to acoustically treat a room | SoundScapeHQ
- How to eliminate echo and reverberation in a room? • AddictiveSound